
Geofences
Geofence is a virtual perimeter for a real geographic area.
Intoduction to Geofences
Geofences are used to define virtual perimeters. The system can control whether object crossed geofence border (either "in" or "out"). All these events are logged, so user can obtain geofence reports and receive alerts.
Moreover, you can assign various rules for events to particular geofences. For example, if you need to get speeding alerts only within a certain area (e.g. in city) or route.
To access Geofences tool click the Polygon icon on the map toolbar. Here you can create and import new geofences or edit the existing ones. To display desired geofences on map simply mark checkboxes.
Geofence types
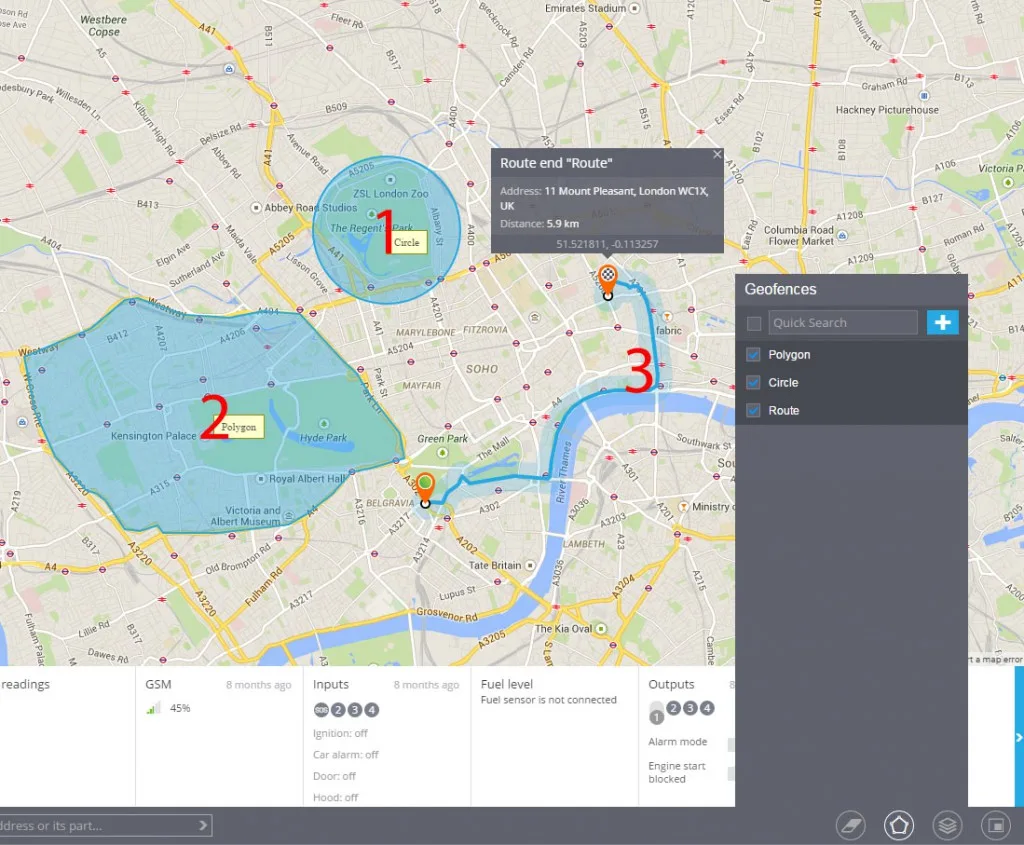
There are three basic types of geofences available:
1. Circle - geographical area with a given center and the shape of a circle with a minimum radius of 20 meters (radius and center of the circle are defined by user).
2. Polygon - area bounded by an arbitrary polygon with any number of vertices.
3. Route - allows to create a virtual perimeter between two (or more) points. E.g., it is used in order to ensure that a vehicle doesn't leave a predetermined route, and if it does, an alarm can be set to inform the interested party.
How to create a geofence
1. Locate the desired area on the map. You can use 'Address search' tool.
2. Choose 'Geofences' tool by clicking on the Polygon icon in the bottom of screen.
3. Click the Add geofence button.
4. Choose one of three shapes from the list and enter geofence name.
5. Draw a geofence on the map:
1. Circle - move a circle with a mouse, having pressed the center of the circle. To change the size of the circle pull the point on the edge of the circle.
2. Polygon - initially has a form of the correct pentagon, which can be easily and randomly changed. To add new vertices you need to pull the mouse over the center of one of the polygon's sides. To delete a vertex just double-click on it.
3. Route - you need to choose start and end points, the system will automatically build a route between them. If you want to add more points on the route, drag the route with the mouse. Next, determine the size of the vicinity.
6. Specify the name of the geofence and save it. Geofences you created can be edited or deleted.